To obtain the best results when performing maintenance on the saw chain, follow the steps outlined below:
1. Assess the condition of the chain
Before you start sharpening, the saw chain must be checked for any damage. If there is damage, it may mean that you need to replace the chain immediately.
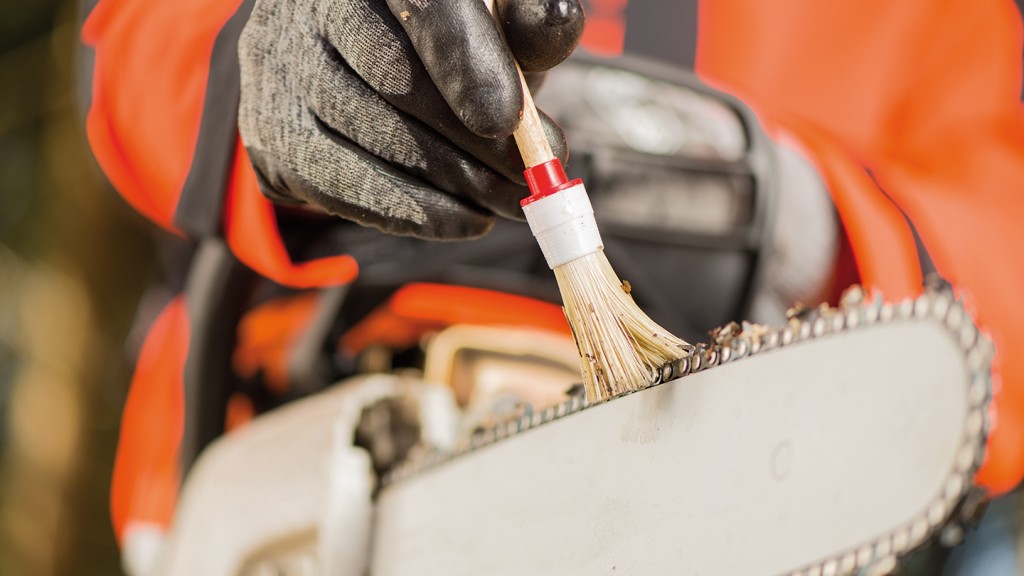
First of all, you should remove any dirt from the cutting set. You will then be able to better assess the condition of the cutting teeth, and keep to the applicable angles more precisely. This will also extend the service life of your files and they will retain their stock removal rate.
Cleaning products that dissolve resin and dirt, as well as brushes, are suitable for cleaning the cutting set.
2. Check the chain tension
To aid the sharpening process, you can tension the chain a little more. Stronger tensioning prevents the cutting tooth from moving or lifting.
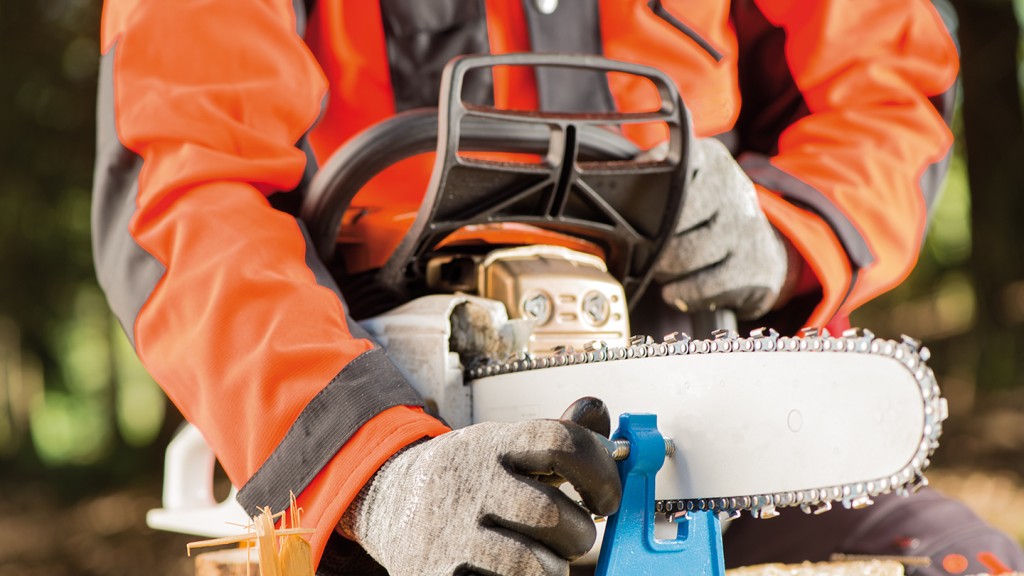
3. Fix the chain saw
To prevent the cutting set from moving due to the pressure exerted during the sharpening process, it is advised that you fix the chain saw in place. This means you can achieve faster and more precise sharpening results.
Do you want to sharpen your saw chain directly on-site in the forest? Using PFERD TOOLS' portable stump vice made from solid steel, you can fix the guide bar of your chain saw, and move the chain freely whilst you sharpen it. The stump vice can be used flexibly where you want, and can be driven into a tree stump, for example.
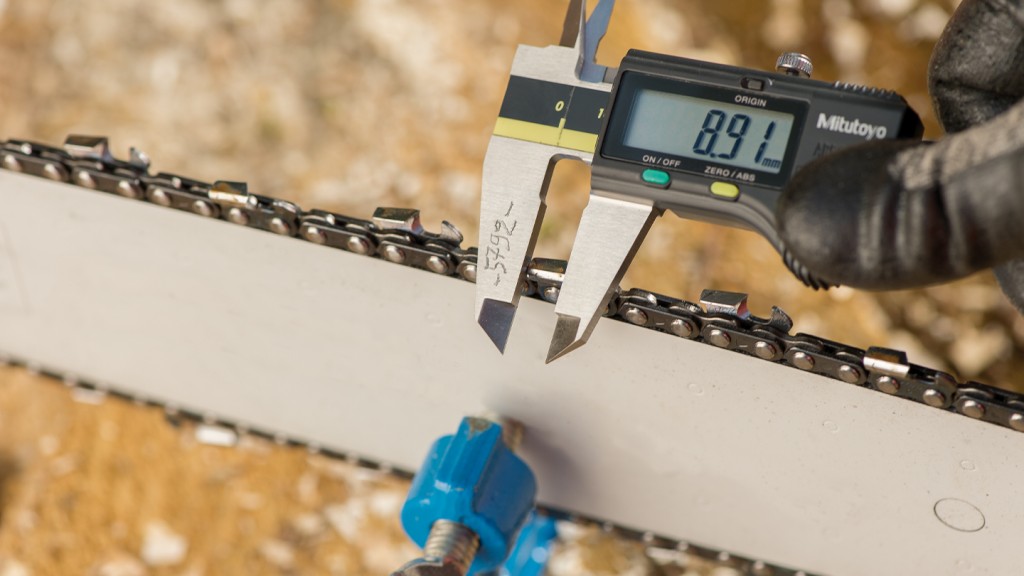
4. Determine the shortest tooth
The shortest cutting tooth can generally be determined visually. If you are sharpening the saw chain at home or in a workshop, you can also use a calliper.
Now sharpen the shortest tooth and use it as a gauge for working on the remaining cutting teeth. All of the teeth must have the same length. A uniform tooth length helps to create an even and straight cut. Minor deviations of up to .020" (0.5 mm) do not have a noticeable effect on the cutting behaviour.
Tip: Mark the first tooth you have worked on using chalk. This makes it easier for you to see when you have finished sharpening one side of the chain later on.
Actuating the chain brake makes the sharpening process easier as the chain can no longer move.
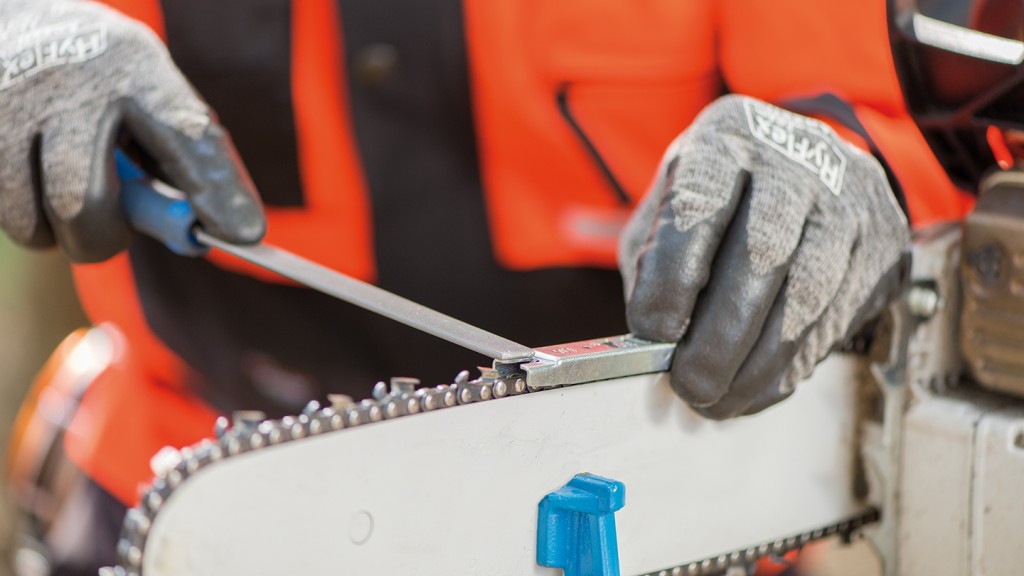
5. Sharpen the saw chain
A tried-and-tested method is to first of all sharpen the row of teeth on one side, before you move on to the other.
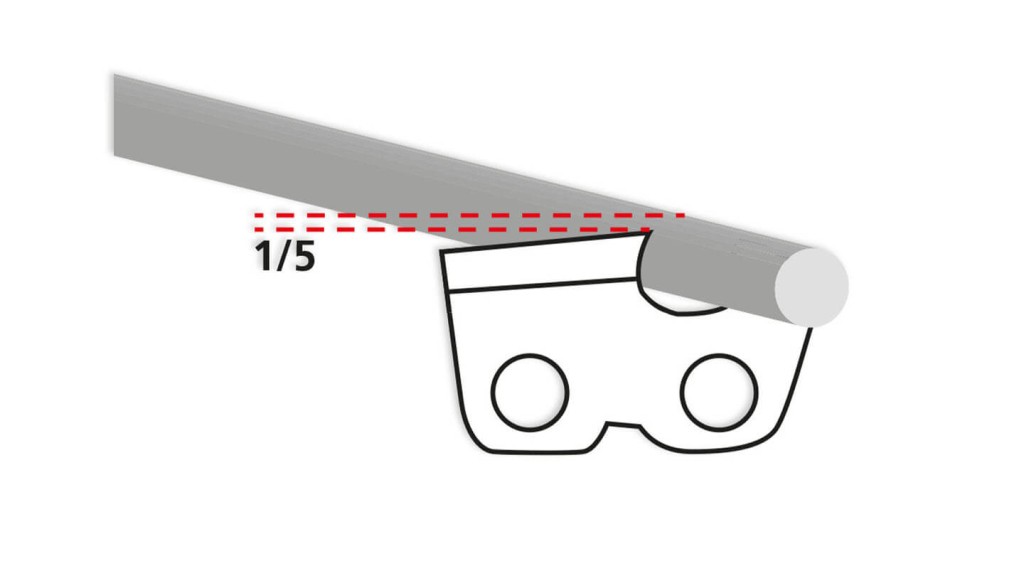
When you sharpen the saw chain, the diameter of the file should protrude 1/5 (20%) above the top plate. The file is guided at a 90° angle horizontal to the guide bar. The recommended sharpening angle is 30°.
During maintenance of the saw chain, it is recommended that you file from the open inner side of the cutting tooth outwards. You should also exert a light, even contact pressure on the file when you move it forwards.
The file only removes material when it moves forwards. When moving the file backwards, you should therefore take care not to touch the chain as far as possible. In this way, you will not only avoid damage to the cutting tooth, but also wear on the file itself.
You should only work on the cutting tooth to avoid unintentionally damaging other components.
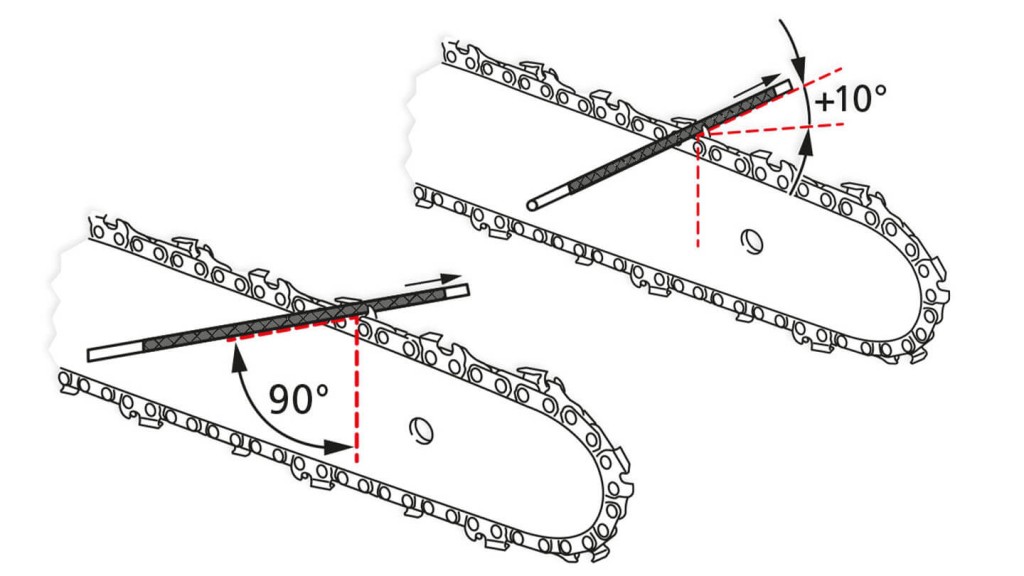
Depending on the chain or tooth type, along with the manufacturer's recommendation, move the file horizontally = 90° to the guide bar or with a + 10° gradient. The sharpening angle may also be different.
Using a filing template makes it easier to adhere to the recommended sharpening angle. For each tooth, perform the same number of file strokes, to keep the length of the teeth as consistent as possible.
You must observe the information and recommendations provided by the manufacturer of the chain.
6. Check the results of the sharpening process
You must check the following points after the sharpening process:
- Has the sharpening angle been complied with?
- Are the side plate angle and top plate angle correct?
- Does the length of the tooth match the length of the tooth before it?
Light reflected on the cutting edge indicates that the tooth has not been sharpened sufficiently.
7. Check the depth gauge
Once all the teeth on a chain have been sharpened, the depth gauge distance must be checked and adjusted if necessary. Applicable gauges are available which can be used to quickly check the distance. You can use a flat file to adapt the depth gauge distance.
8. Final steps
The final step is removing metal shavings from the saw chain. You should also thoroughly clean the files and any other tools you have used.
Before you use the chain saw again, you must check the chain tension. Also observe information from the manufacturer.
You should regularly examine the condition of the components of your cutting set. The condition of the guide bar and drive wheel also influences the running properties of the saw chain, the power transmission and the cutting quality.
How can you tell if the results of the sharpening process are perfect?
The characteristics of a perfectly sharpened saw chain are:
- The same sharpening, side plate and top plate angle on all teeth
- Cutting teeth with the same length
- Even depth gauge distances
What are the alternatives to traditional sharpening?
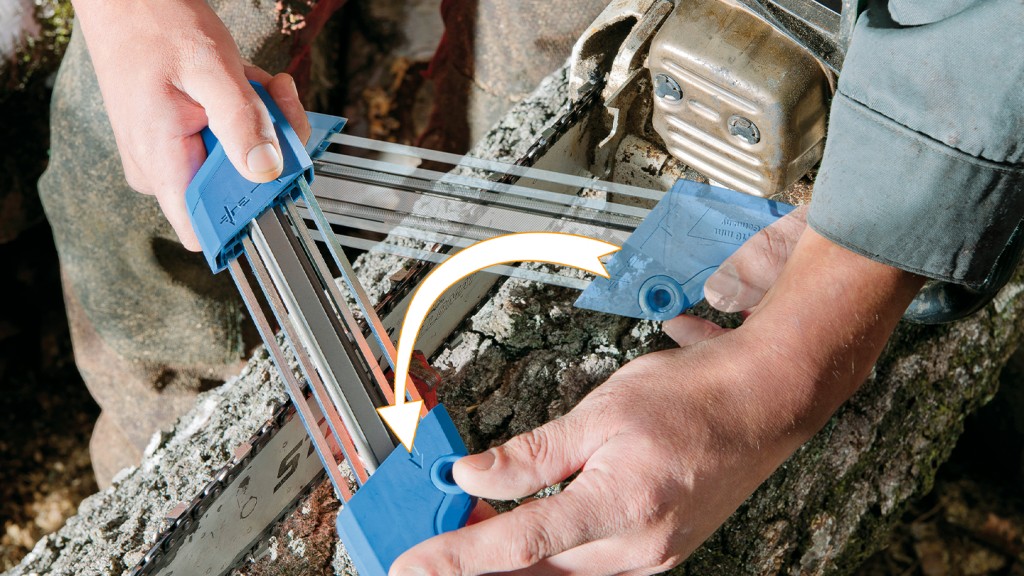
Sharpening using chain saw files and depth gauge files requires you to have a lot of experience. Thanks to the chain saw sharpeners from PFERD TOOLS, users who do not have as much experience can also achieve precise and uniform sharpening results.
The CHAIN SHARP CS-X chain saw sharpener is a sharpener, depth gauge file and chain saw file in one. It allows the saw tooth to be sharpened whilst the depth gauge is adjusted at the same time.
Thanks to its ergonomically optimized shape, the chain saw sharpener can be guided precisely, so that perfect sharpening results can be achieved. When you change from the right to the left tooth, there is no time-consuming conversion process – you can just simply turn the device around.